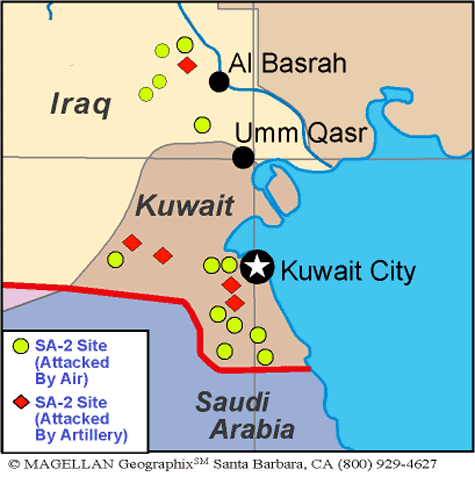
Figure 5. SA-2 Guideline sites attacked during the Gulf War
| First Page | Prev Page | Next Page | Back to Text |